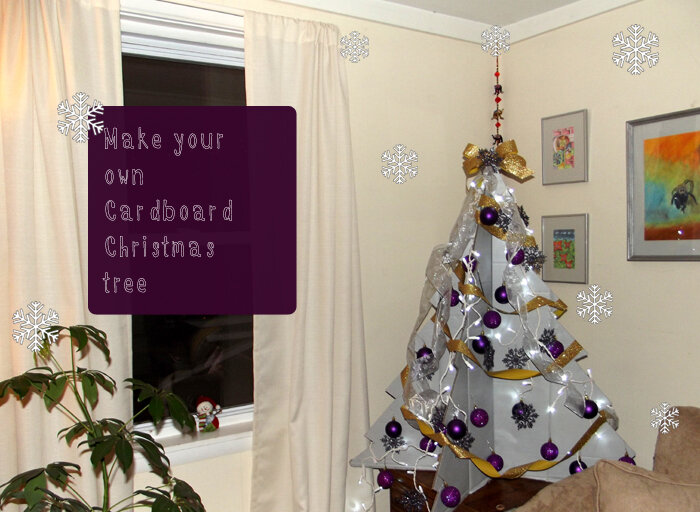
DIY: How To Make A Cardboard Christmas Tree
Step by step tutorial about how to make an awesome Christmas tree made out of a big cardboard box.
Have you ever had an idea and you weren't sure how to make it a reality but for some reason you knew deep down that it was going to work?
Something similar happened to me not too long ago. So I've been wanting to buy a cardboard Christmas tree for a while now because I saw them in the stores and they look quite fun. I also didn't want to deal with a real Christmas tree in my tiny apartment, plus I wanted something creative to decorate my home this year.
At the same time, I had to buy a new couch, and this couch just happened to come in a really big box. Ans that’s how I almost felt the cartoon light bulb pop up above my head, I was going to make my own cardboard Christmas tree!
At first I had no idea how I would make it but I was pretty sure it was going to work and guess what? It did!
How to Make a Cardboard Christmas Tree:
1. Get a big box. Find a box. Small box = Small tree, Big box = Big tree, any box should work!
2. Open the box completely.
3. Cut two rectangles from the box. I used the two biggest sides of the box, so mine were about 3´4” x 3´7”.
4. Draw two triangles on both rectangles and cut them out. Use a part of the box as ruler and cut them out using an exacto knife. They should look like the one below.
5. Cut some zig-zag lines in the sides of your cardboard triangles. This will give them that special Christmas tree look. Like the image below.
6. Draw a line from the middle of your cardboard Christmas tree from the top to the bottom. This line should have a small amount of width, similar to the width of the cardboard you are using, mine was about a quarter inch wide. Then you will cut that line out using a pair of scissors or an exacto knife.
Draw another line to the other cardboard piece, but this time from the bottom to the top, and in the middle again. Cut that line out using a pair of scissors or an exacto knife.
Check out the image below to see how it should look like.
I also created a mini version video tutorial over instagram: Check it out, cardboard Christmas tree mini version. It will give you a better idea about how to make this Christmas tree in a bigger scale.
7. Paint your cardboard Christmas tree! This step is not 100% necessary but it can be fun to add a little something extra to your cardboard Christmas tree! I used acrylic paint in a light gray tone. You could also use spray paint in a festive gold or silver tone, or something bright and unique like hot pink.
8. Fit both of parts together. Insert one of the cardboard Christmas tree parts, the one that is cut from the bottom up into the cardboard Christmas tree inside the one that is cut from the top down. At the end your Christmas tree should look like the image below.
9. Decorate your cardboard Christmas tree. I used a pair of chunky big holiday lights and some ribbons. I also punched some holes on the sides of the cardboard Christmas tree and added ornaments, and even a ribbon at the top.
I really love it, it looks so great that I almost forgot it was just a big box a few days ago. My favorite part is that it is exactly the right size for our apartment, just perfect!
If you make one, don’t forget to let us know over Instagram.


