DIY: Colorful Panels for Your Walls
 If you are looking for fun ideas to decorate your kid’s room, well, here is one creative, original and yet, functional project you are just going to love.We just moved to a new apartment a few weeks ago and we didn’t realize that we couldn’t paint the walls until a couple of days before we moved. So I got motivated and look for some inspiration around the web, I needed to find a fun and colorful solution to add some personality to our new baby's room and prevent the space from feeling flat and boring.Just because you can’t paint your walls doesn’t mean that you need to live without color in your home, right?
 Well, I saw a couple of walls painted with different colored squares and decided I wanted the same effect in my baby's room, it looks so much fun! So it occurred to me that instead of painting directing on the walls, I was going to paint a couple of wooden panels and hang them on the wall.When I went to the store, I found a couple 24 in. x 24 in. pegboard panels, the size was just perfect for my wall, besides, I began to imagine the amount of things that I could hang on them. These colorful squares wouldn’t just look nice, they will also work as an organizing tool.
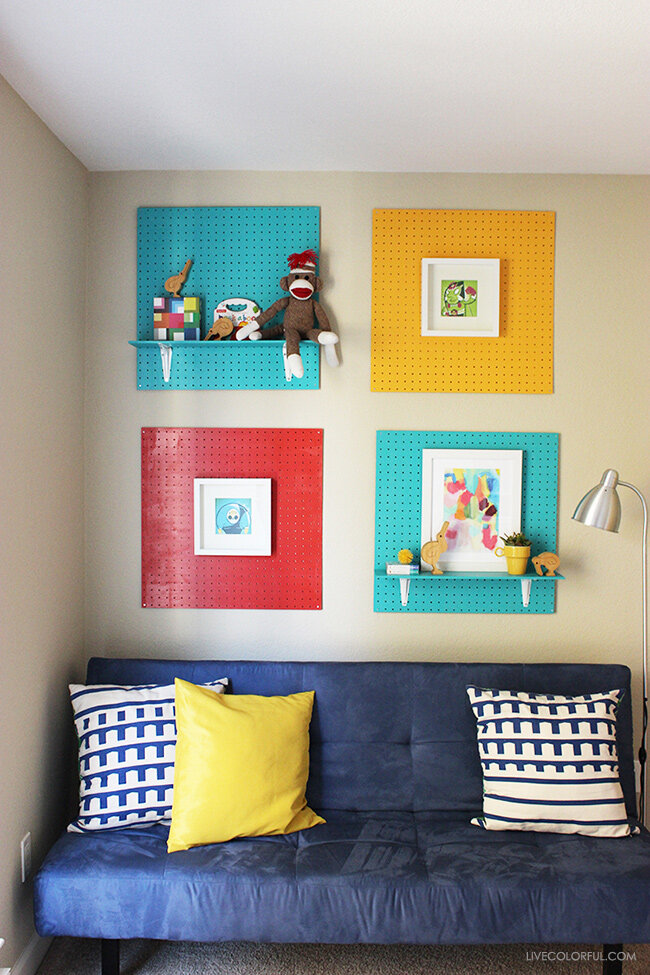 Check out the materials and steps to recreate this colorful and fun project:MATERIALS:
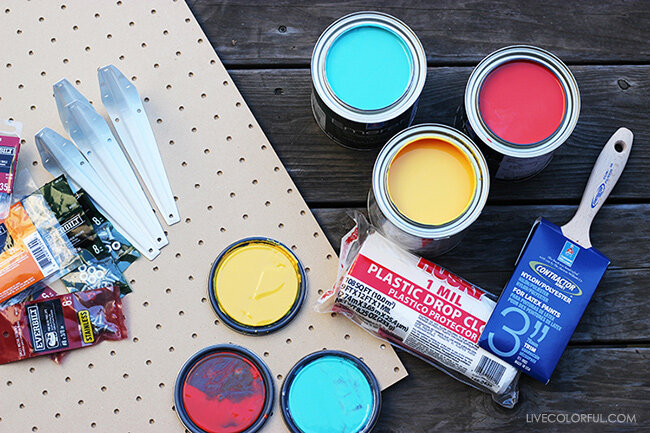
- 1 Quart of Interior Acrylic Latex Paint. Color: Nasturtium (SW 6899). Sherwin Williams Emerald line. Semi-gloss
- 1 Quart of Interior Acrylic Latex Paint. Color: Fireworks (SW 6867). Sherwin Williams Emerald line. Semi-gloss
- 1 Quart of Interior Acrylic Latex Paint. Color: Surfer (SW 6946). Sherwin Williams Emerald line. Semi-gloss
- 1 Brush 3”. Sherwin Williams Contractor Series® Nylon/Polyester blend Trim
- 1 Mil 9' x 12' Plastic Drop Cloth
- 4 Pegboard Panels (24 in. x 24 in.)
- 4 White Shelf Brackets (5 in. x 6 in.)
- 2 Poplar Hobby Boards (0.25 in. x 5.5 in. x 24 in.)
- Screws, hex nuts and nails. Ask for the best materials to install the shelves and pegboard at your local store.
 STEPS:1. I found out that I needed to drill a couple extra holes to install the shelves on the pegboard panels. Before you start painting check out what you need to do to install the shelves on the pegboard panels and the pegboard panels on the wall.
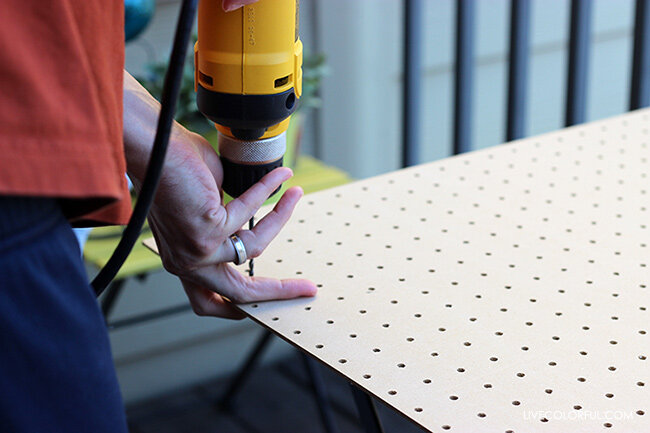 2. Prepare your workspace. I used a plastic drop cloth (Sherwin Williams 1 Mil 9' x 12' Plastic Drop Cloth) to cover the floor and prevent it from getting dirty while painting.3. Now you can start painting the panels. Since I was looking for a fun and energetic effect, I decided to use three different colors for this project: Nasturtium (SW 6899), Fireworks (SW 6867) and Surfer (SW 6946). I really like how these colors look together.I applied two layers of each color. I use the Sherwin Williams Emerald line, the paint finish looks smooth, soft and the color is amazing and vibrant. I also recommend the semi-gloss finish for kids rooms, it’s so much easier to clean.
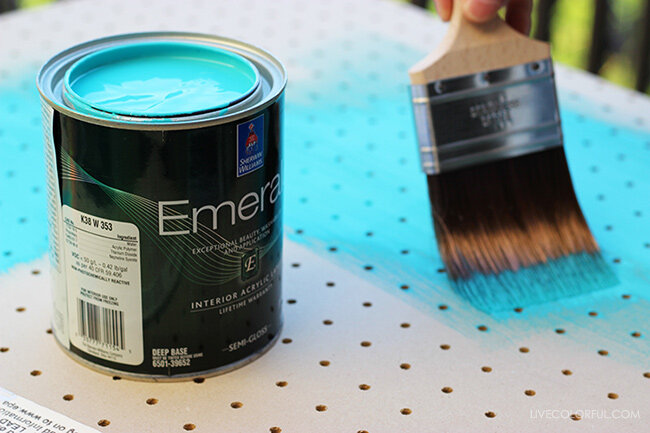 Tip: Just one color for all the panels would look great as well. I recommend that you look for colors that contrasts with the walls, and/or matches the accessories that you already have in your space.
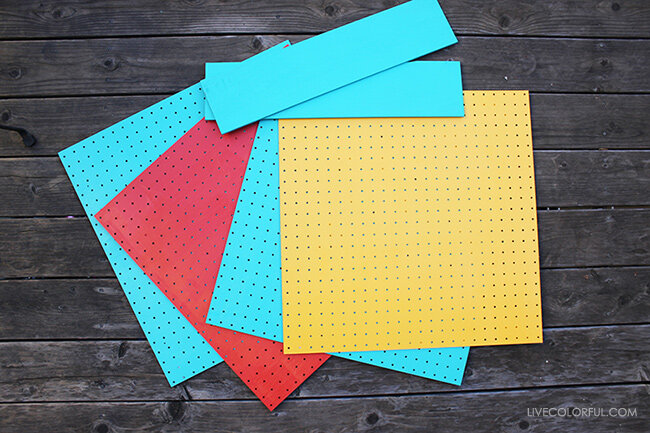 4. When the panels are dry, it’s time to assemble the shelves.
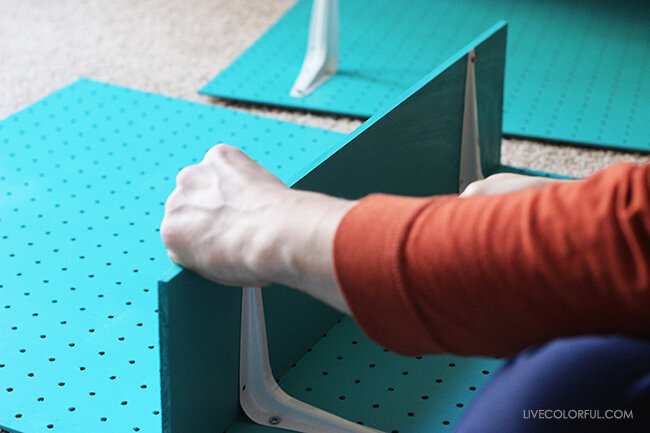
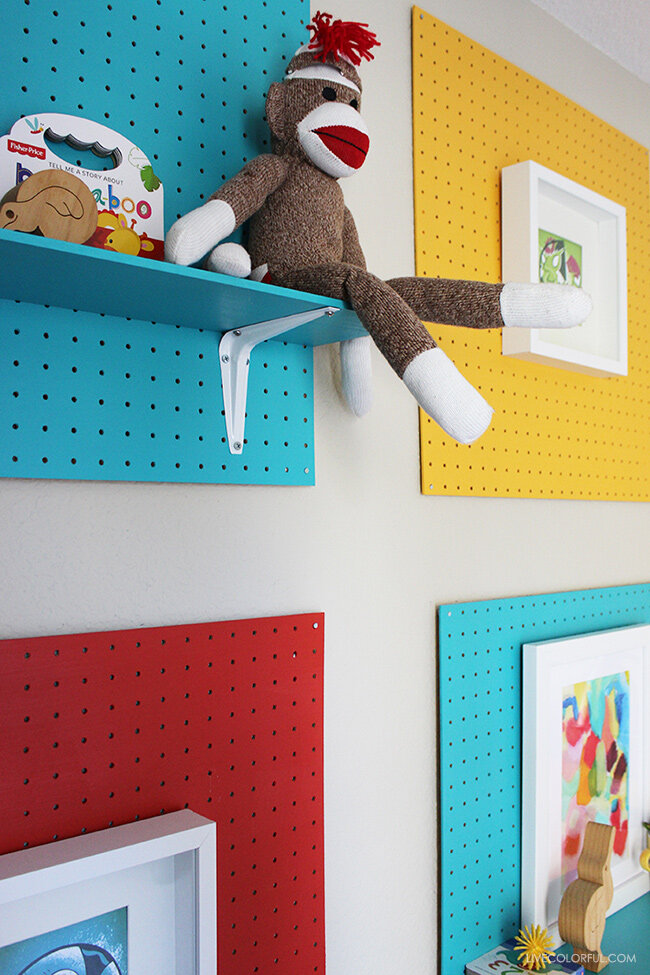
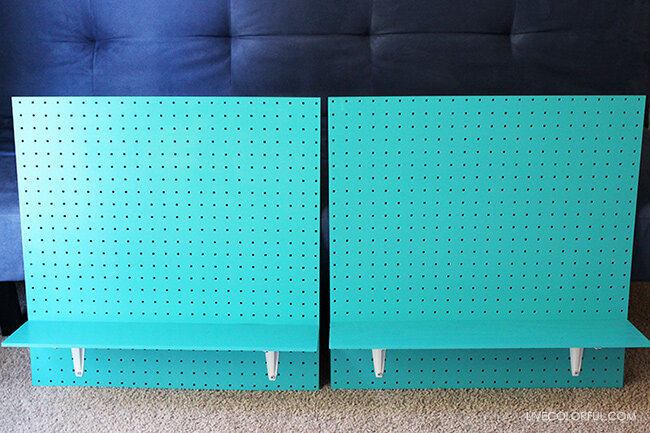 5. Remember to measure your walls to determine where you are going to install each piece.6. Now it’s time to hang the panels on the wall. I used a couple of nails, one on each corner of each panel. Add screws if you are looking for something more durable and strong. Also, if you want to use the pegboard to hang things, place a washer between the pegboard and the wall.
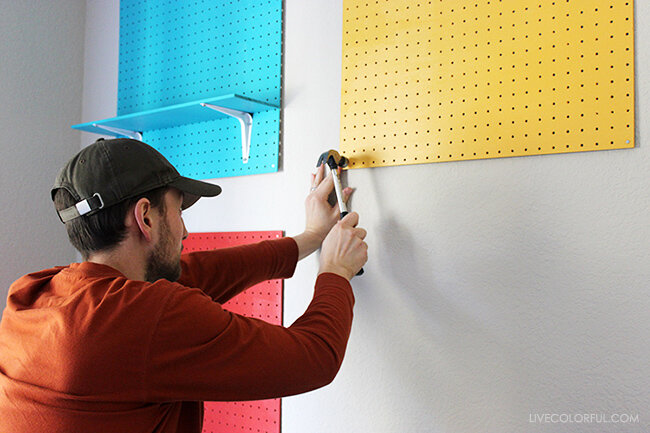
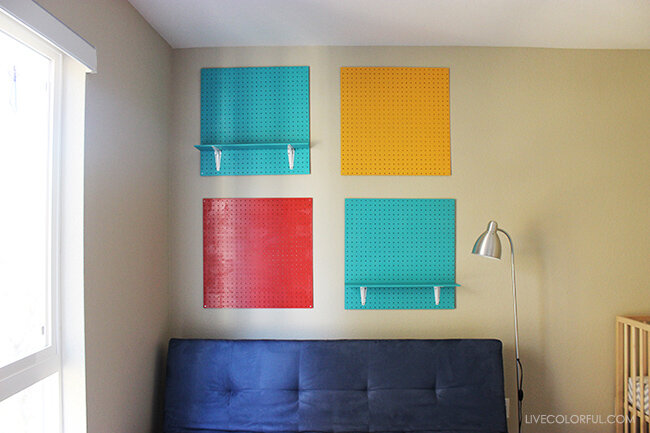 This idea is very original, functional and your child will love it because it's really fun too!Another material that can be used instead of pegboard is plywood but you might have to drill some holes on each side to attach them to the wall.
 You can use one big pegboard, two, three, four or even cover a whole wall with them! The great thing is that you can take them with you if you move some day and also, you can personalize them as much as you want! Hang things from them, add art pieces, toys, plants and almost anything you can think of. This idea would be great for an office space as well, don’t you think? Like I said, there are no limits. Have fun!
 Disclosure: This post was created in partnership with Sherwin Williams. All pictures and opinions are my own. Thanks for supporting the sponsors that allow me to create new and special content like this for Live Colorful. The original post is in Spanish on the Sherwin-Williams Latino blog. Find it here.