DIY: Make a Puppet Theater with Milk Carton
How to make an adorable and fun puppet theater for kids reusing and recycling a milk carton.
A few days ago, I made a small theater with a milk carton because I was inspired by other friends that were sharing craft projects reusing and recycling milk jugs over Pinterest. I love the challenge, and I also love the opportunity to turn trash into something fun and useful.
I used a milk carton instead of a jug. I clean it up and then decorated it into a cute mini puppet theater with some pieces that move around. My toddler is really into colors and movement, so he really had a great time with this.
Now that you see how I made my puppet theater, you will know how easy and creative this project can be. It’s definitely a great way to spend the afternoon being creative and crafty with the little ones!
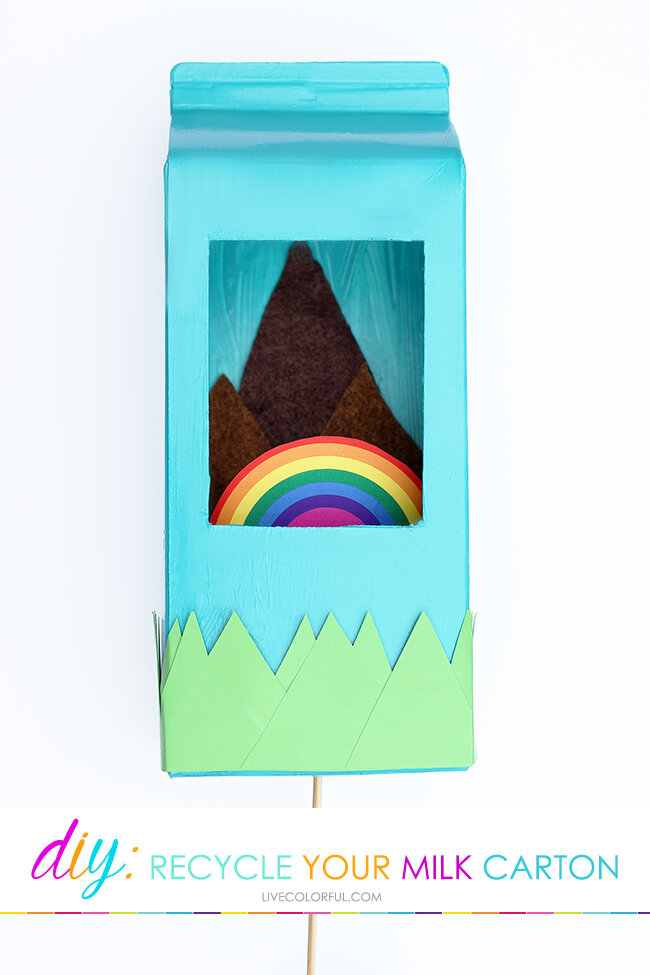
I created a sky with some mountains and grass, but you can choose another theme, like forest animals, sea creatures or a dinosaur kingdom puppet theater. I’ll give you some ideas about that below :)
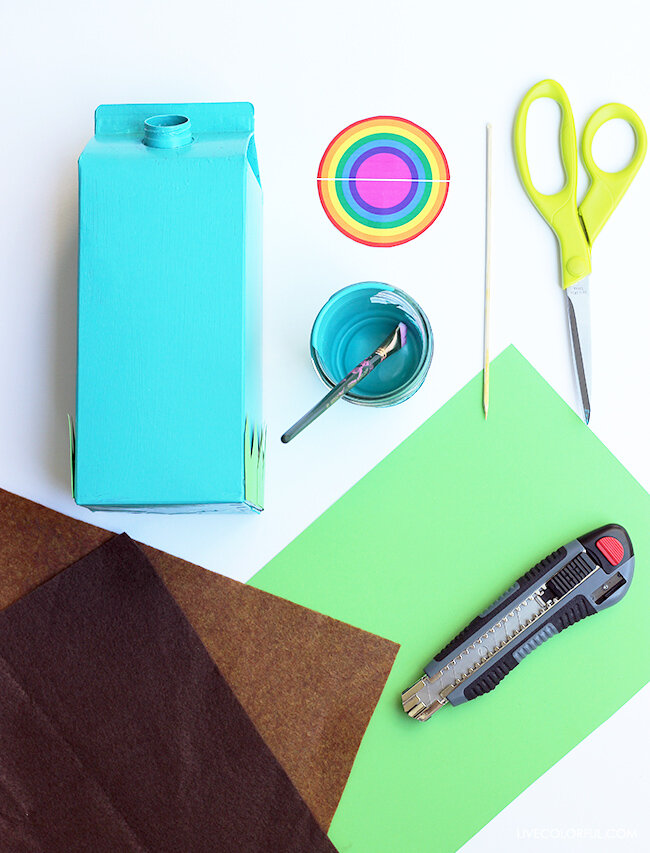
MATERIALS:
Scissors
Glue like tacky glue or hot glue and a hot glue gun
Brushes
Skewer sticks
How to Create a Puppet Theater with a Milk Carton:
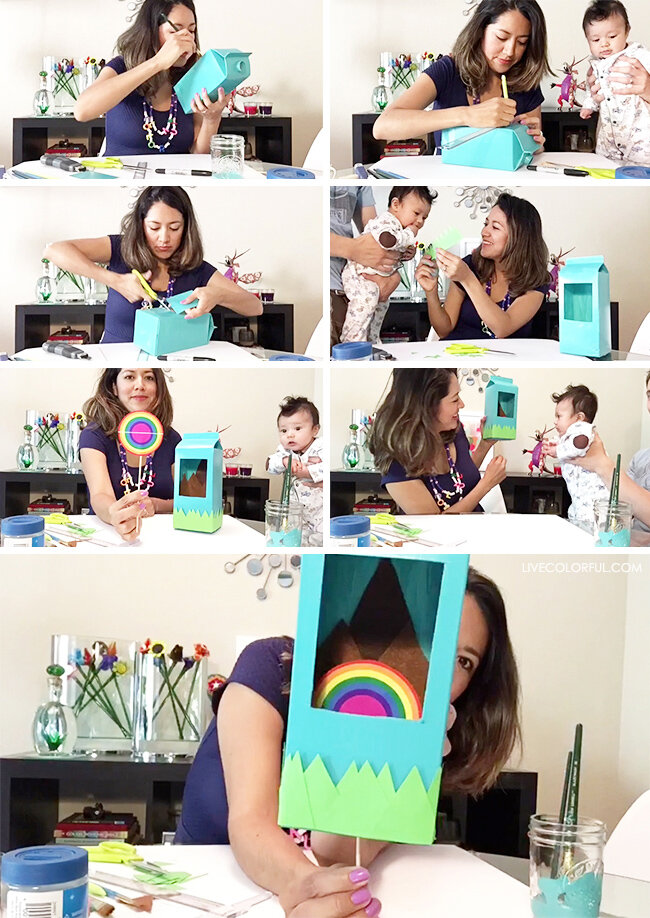
Make sure that you clean your milk carton as much as possible before you start this project. There is a part in the process when you need to cut a part of the milk carton to make the puppet theater scenario, and this is a great opportunity to wipe all the inside of the milk carton using a paper towel or a cloth.
Paint the milk carton. Use acrylic paint to paint your milk carton completely in all the sides. You can also paint the inside using another color or the same color
Cut a rectangle for your puppet theater. Measure and cut a rectangle in the front of the milk carton to be able to see the show in your puppet theater. I used regular scissors for this. I made a hole punching with the same scissors in one of the rectangle corners and then I cut all around the whole rectangle.
Decorate the outside of your puppet theater. I added some triangles out of construction paper around the outside of the milk carton, simulating grass. If you are creating a sea creatures puppet theater, make waves like we did in this project here! If it’s a forest theme, you can add mushrooms in the outside or big pine trees. For a dinosaur kingdom theme, add some grass as well, or leaves.
Decorate the inside of your milk carton puppet theater. You can paint and decorate the interior of the milk carton a bit too, because you will see part of it from the outside.
I added a couple of mountains using brown felt sheets. Whatever you want to create for the inside you can do it using construction paper instead of felt, especially if you don't want to buy more craft materials, but I love the idea of adding different textures because the end result is more interesting. It’s also fun for the little ones to touch so many different textures when they are playing with this puppet theater.
If you are making a sea creatures puppet theater, I would add bubbles inside or star fish, for a forest theme, I imagine some butterflies or leaves. In a dinosaur kingdom puppet theater a volcano would be awesome!
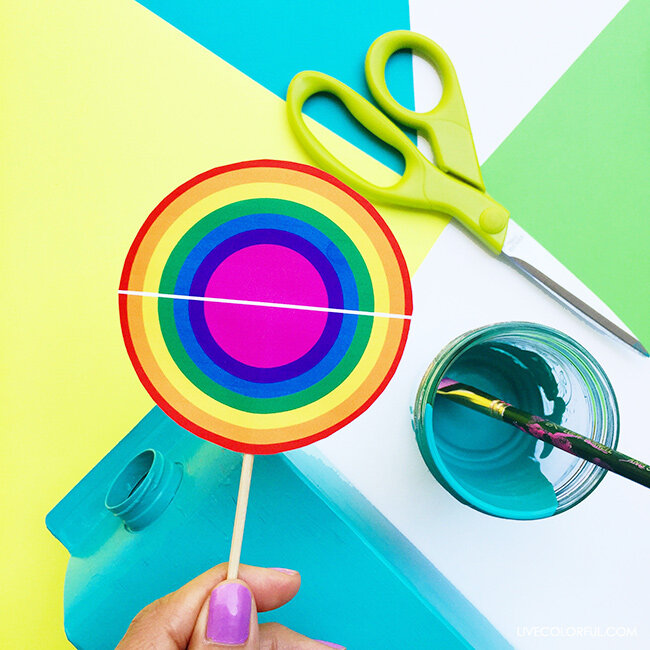
Create a puppet! I printed a rainbow as a puppet, but you can create your own sea creature, your favorite forest animal and your favorite dinosaur. To make your puppet move, make a hole in the bottom of the milk carton and insert a skewer stick. Then tape or glue your puppet on the skewer. The stick will move around and up and down.
If you make your paper puppets smaller you can add maybe two or three skewers there!
The kids will love this project! Encouraging creativity is a good way to spend time with the family and help build a better future while recycling!
Check out the time lapse for this project that I shared on YouTube :)
This is part of a sponsored collaboration with the California Milk Processor Board and DiMe Media. However, all ideas, images and opinions expressed are my own.