How to Decoupage a Plastic Bowl with Scrapbook Paper
This is how I decoupaged a boring plastic bowl with colorful pieces of scrapbook paper.
This post may contain affiliate links.Thank you for supporting this website!

A few months ago I found a package of 4 turquoise plastic bowls on Target. I bought them since I needed new mixing bowls for my kitchen. I also loved that color a lot! I used the biggest bowl to display fruit and other decorative elements on the dining table. It was functional but it looked kind of boring. I have always wanted to decoupage on plastic to see how it works. So I jumped into the adventure and tried it for the first time.
I made a mess at the beginning. I cut pieces of scrapbook paper that were too big, and they were falling down. So I took them off and I started all the process again. That's how I learned these tips below.
MATERIALS:

Tips about how to decoupage plastic containers:
Pick the scrapbook paper design wisely. Decide on a design that can be cut into small pieces and that will look good in a round shape.
Cut small pieces of scrapbook paper in order to create a perfect round bowl shape. The smaller, the better, especially if the paper has is thick.
Apply mod podge on the bowl and also on the top of the pieces of scrapbook paper to make sure they stay in place.
Don't wait too long to glue the scrapbook paper pieces. As soon as you apply the mod podge, apply the scrapbook paper pieces and a layer of mod podge on top.
You need to be patient because you will need to hold the scrapbook paper in place for a few seconds, and then let them dry.
Glue the scrapbook paper pieces in a line, going all around the bowl, then add another line. Start from above to below like in a spiral until you cover all the surface.
Apply two or three layers of mod podge on top of your finish design to make sure all pieces stay on place. Let every layer dry for a couple of hours before applying the next one.
With plastic, you need to apply more mod podge than with other materials like paper or wood, and wait a few second between each piece since the plastic is slippery and the pieces move a lot.
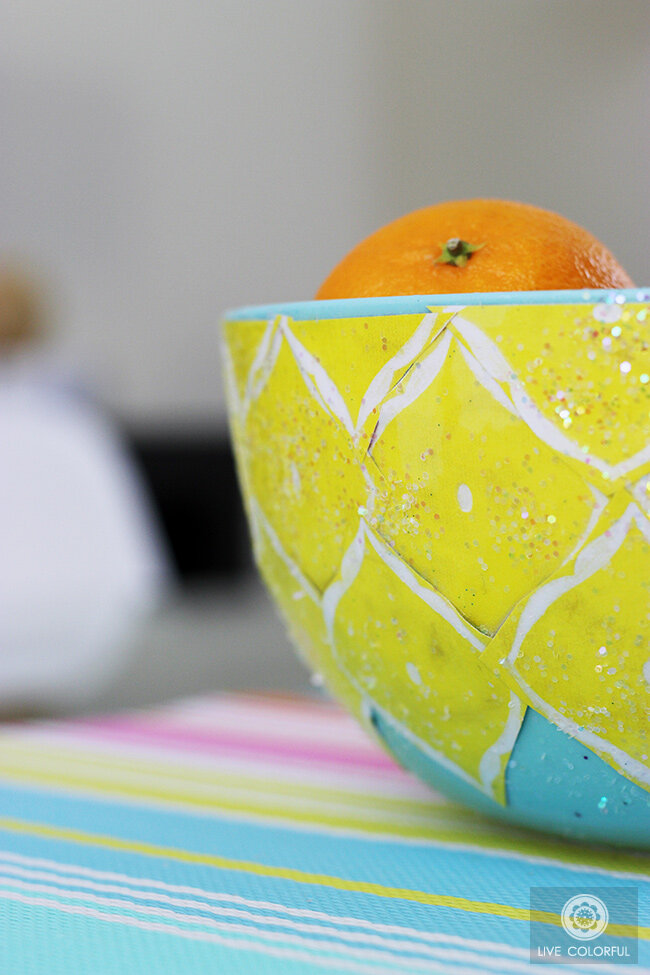
I couldn't resist so I add some glitter on the top. It looks really cute, and the glitter actually stayed on the place because I applied two mod podge layers on top.