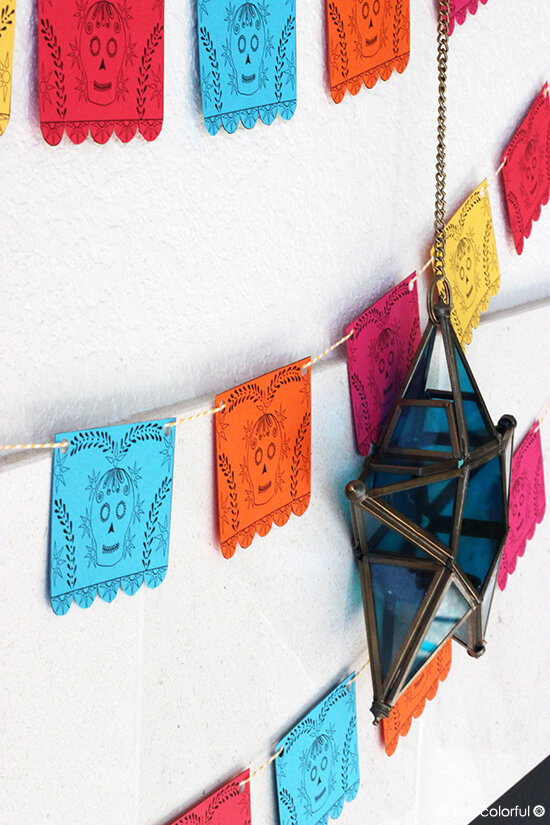
Free Printable: Mini Papel Picado
Turn your home into a lively Día de Muertos celebration with this mini papel picado. Print it out, cut the pieces, and have fun mixing up the colors for a playful look.
Hey there, the Day of the Dead (Día de Muertos) is just around the corner!
I absolutely love decking out my house in fall vibes inspired by this celebration. Despite its name sounding a bit somber and spooky, "Day of the Dead" is actually really special and fun. It's all about honoring our loved ones who have passed on in a happy, vibrant, and most importantly, colorful way!
One of the coolest parts of this celebration is making papel picado, those intricately cut paper banners you see adorning altars on November 1st and 2nd.
I've created various papel picado designs using construction paper, tissue paper, and even a printable. Every year, I love decorating the house in a different style for Día de Muertos, and I always involve the kids in the process. We enjoy experimenting with different techniques and materials to make each decoration unique and special. It's a fun way to explore creativity together while honoring this meaningful tradition.
This year I've whipped up a mini papel picado printable (check it out below) for you to download, print, cut, and hang in your home. You can use it to jazz up your altar or string it alongside your Halloween decorations throughout the fall season. It's a fun and easy way to add a touch of festive spirit to your space!
NOTE: Unfortunately a few moths ago the site crashed and we lost the original PDF printables, but I created a new version below that I hope you like as much as the other one :)
Download the high res printable here: MINI PAPEL PICADO PRINTABLE
MATERIALS:
Mini Papel Picado printable
Printer
Thread or yarn
How to create a mini papel picado garland (free printable):
Download and Print the Mini Papel Picado PDF:
Start by downloading the mini papel picado PDF and send it to print in black and white. Choose colorful cardstock that is slightly thicker than regular paper to give your decorations more durability and vibrancy.
Cut Each Piece of Paper:
Carefully cut out each piece of papel picado using scissors.
Punch Holes:
Use a hole puncher to create two holes on each side of every paper piece. This step is crucial for threading the pieces together seamlessly. Check out the pictures below for more details.
Thread the Pieces:
Thread a piece of string or thin ribbon through the holes of each paper piece. Experiment with the order of the different color card stock combinations to create a playful and eye-catching effect.
Hang Your Mini Papel Picado:
Once all pieces are threaded onto the string, hang your mini papel picado in a prominent place. Whether it's across a doorway, on a wall, or draped over furniture, it will add a festive touch to your home this fall.
TIP: If you don’t have a printer, you can make a similar garland drawing a couple of papel picado designs in a regular paper sheet using a black pen and then photocopy it in different colorful card stock sheets.
May your home be filled with warmth, memories, and the spirit of Día de Muertos as you celebrate with family and friends. I hope you enjoy this easy and simple mini papel picado version :)
Interested in more Day of the Dead (Día de Muertos) ideas and projects?
Check out these related articles:


