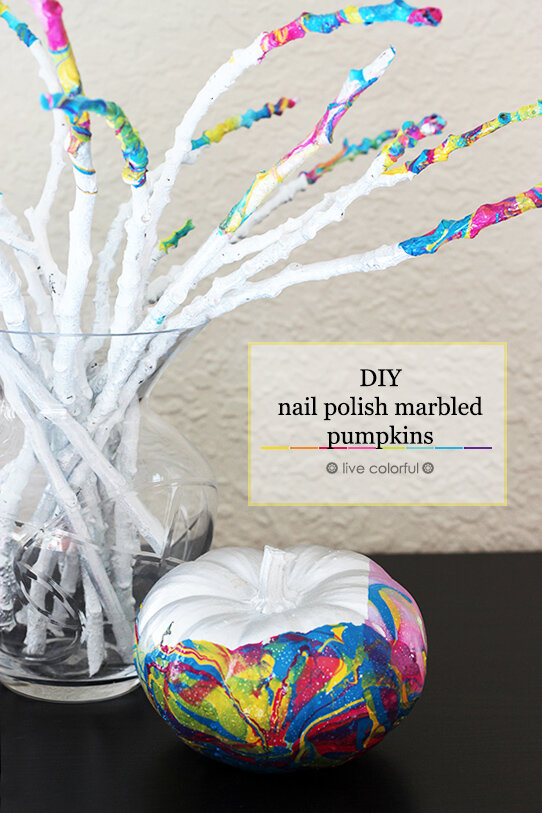
DIY Marbled Pumpkins: A Fun and Sparkling Fall Decor Project
Transform your pumpkins into eye-catching decor with this simple marbling technique using nail polish.
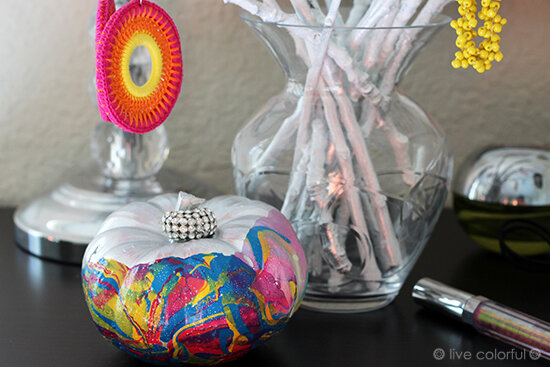
As a Fall contributor at Club Chica Circle , I created a colorful marbled jewelry organizer that inspired me to try a similar technique with a pumpkin. I was curious to see how the marbling would turn out on a pumpkin, and I’m thrilled with the results!
I’m using the pumpkin as a ring holder next to the jewelry organizer I made with twigs. The vibrant colors and silver sparkles look fantastic, so I’m considering making a few more to use as Thanksgiving centerpieces. How wonderful would that be?
MATERIALS:
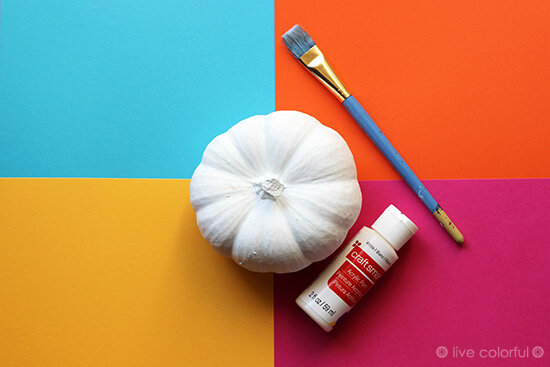
Pumpkins
Paint Brushes
Colorful Nail Polish
A Plastic Container and Water
How To Create Marbled Pumpkins with Nail Polish:
Prepare Your Pumpkins:
Begin by painting your pumpkins with one or two layers of white acrylic paint. This base coat helps the marbling colors stand out and ensures a smoother application.
Allow the paint to dry completely between coats.
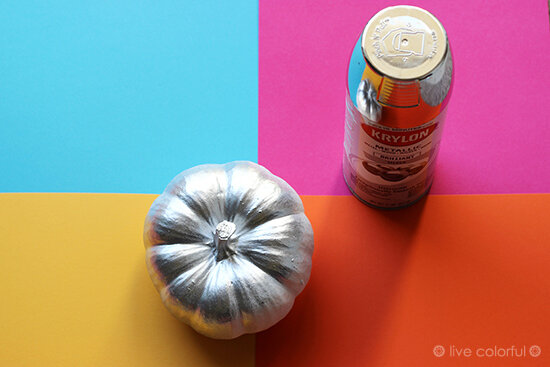
2. Add a Shiny Finish (Optional):
For a bit of extra sparkle, lightly spray a thin layer of silver spray paint over the dried white base coat. This step adds a glittery sheen that enhances the overall look.
Be sure to do this in a well-ventilated area and allow the spray paint to dry thoroughly before proceeding.
3. Prepare the Marbling Solution:
In a plastic container, mix several nail polish colors with room-temperature water.
Start by adding a few drops of each nail polish color into the water, allowing them to spread and form a circular pattern.
Continue adding colors until you have a design that covers at least half of the pumpkin.
Stir gently with a toothpick or stick to swirl the colors together if desired.
4. Marble the Pumpkin:
Carefully submerge the pumpkin into the water, ensuring that the section you want marbled is dipped into the nail polish mixture.
Hold the pumpkin just below the surface of the water for a few seconds to allow the colors to adhere. Be gentle to avoid disturbing the design.

5. Dry and Set:
Once you’ve removed the pumpkin from the water, place it face down on a plastic bag or a piece of paper.
This will catch any drips and prevent smudging.
Allow the pumpkin to dry for a couple of hours. The marbling effect should set beautifully as it dries.
The steps for marbling pumpkins with nail polish are very similar to those in my previous tutorial. Just keep in mind that for larger pumpkins, you'll need a bigger container and a bit more nail polish.
I’m excited to start planning our vibrant Thanksgiving decorations this year!