How to Make your Own Day of The Dead Stickers
Here is an easy way to create your own Day of the Dead stickers that kids can color!
We are getting closer and closer to the colorful and joyful celebration of the Day of the Dead. With that in mind, it’s a great opportunity to share with the kids this beautiful mexican tradition.
I personally have great memories of this tradition from when I was a kid. It was always a great excuse to ask my parents about their childhood and hear stories about my abuelito and other family members that have passed away.
Looking through old albums, drinking hot cocoa and making papel picado used to be really fun and special. Since my baby was born, I discovered that I wanted to share with him all the traditions I enjoyed when I was a kid, so he can get to know more about them and make those traditions part of his life.
I designed some Day of the Dead illustrations for mom.com a while ago but they are no longer available which makes me sad, but also gave the best idea to share about how you can make your own printable stickers in black and white with the help of your kids!
MATERIALS:
Printer
Scissors
Coloring pencils
How to Make your Own Day of The Dead Stickers:
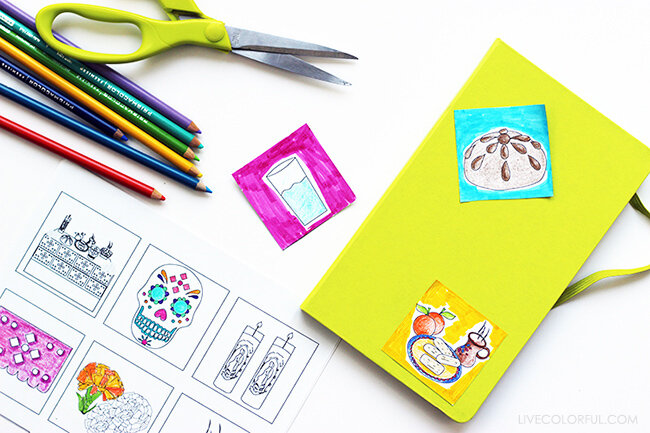
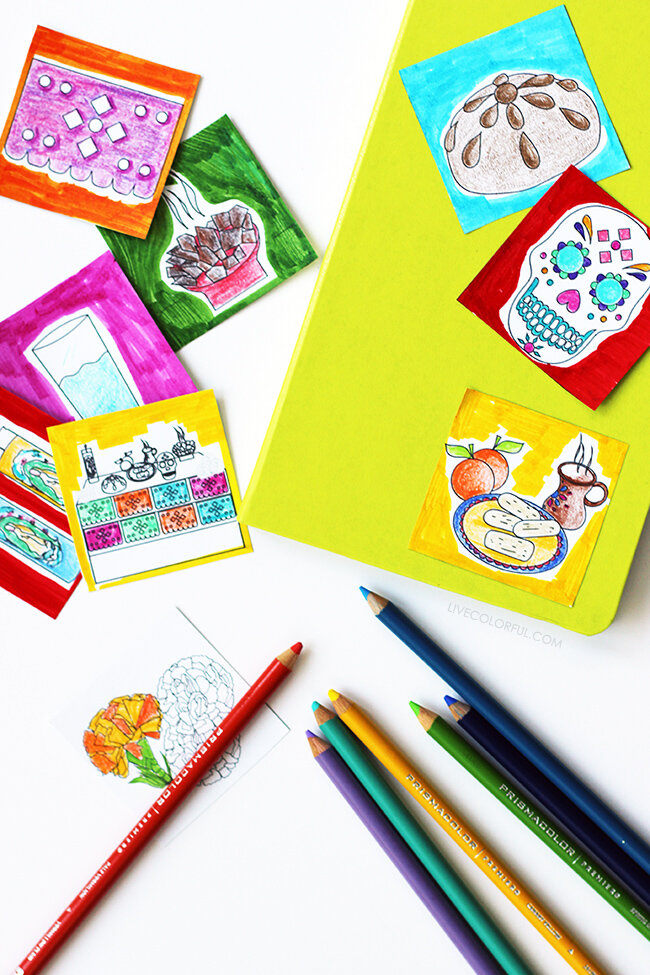
Sketch your design. Use a regular printing paper and a pencil to create your design. Start by measuring a couple of squares inside your paper to delineate each sticker. Inside the squares draw something inspired by the Day of the Dead tradition. I got inspired by the ofrendas and the most popular and traditional elements such as pan de muerto, sugar skulls, food and beverages, candles, marigold flowers, papel picado. I drew each element inside each square. This is even something a kid can sketch to make the stickers extra adorable!
Delineate your design using black ink. To make sure that you can see the lines when you print your stickers, make sure to delineate them using a blank ink pen. I personally love this kind of pen that is popular for illustrations because it truly gives the lines a clean and precise look and when you print the page the black will look amazing.
Print your stickers! This step is totally optional because you can go ahead and cut and color the stickers right away, but I love the idea of editing the illustrations a bit more using the simple options you find in the printer app because they look better.
Scan your sketches to be able to manipulate them easily. Adjust brightness and saturation in the image to bring the black lines pop in the paper. Save your design so you can print it over and over again.
Print your stickers in adhesive printer paper similar to this one here.
Color your stickers! Ok, this is the most fun part and my favorite part! After you print your stickers, you can help the kids cut them out and color them using coloring pencils, that’s why I loved the idea of printing them in black and white, to let their imagination shine and decorate anything they want with this fun Day of the Dead craft project.