DIY: Handmade Upcycled Star Ornament
Make this sweet star ornament using scraps of fabric that you have around the house. This handmade ornament is also a wonderful gift for the holiday season.
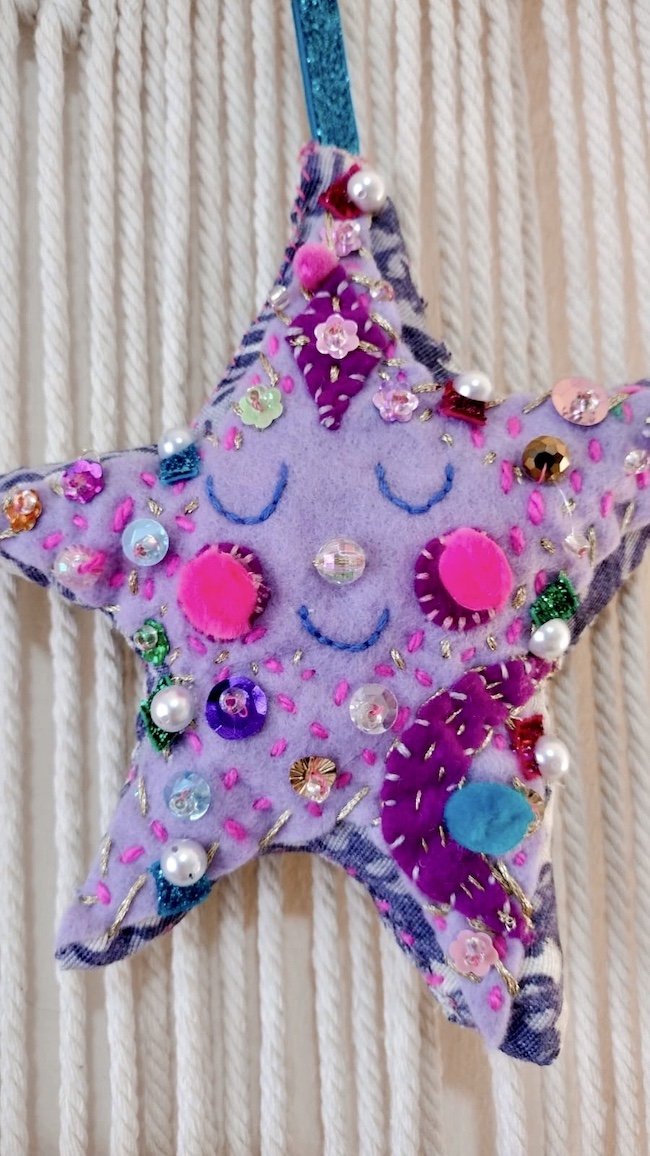
There is nothing more satisfying than using all the fabric leftovers we have around the house in fun and functional project, something that we will actually enjoy, such as these cute star ornaments!
To create one of these star ornaments, we drew a star directly in an up-cycled piece of fabric using a black ink pen. The other materials we used were stuff that we had already at home, such as old scraps of fabric with different prints, felt, pompoms, yarn, beads, buttons, sequins, wadding from an old pillow and hot glue.
The end result is adorable! and you can make many star ornaments using different pieces of fabric, so they all look different. They can have different colors, and more or less decorative details like beads, buttons and sequins. You could also try different shapes, we made a star, but you can try with a sphere, a square or a flower!
How to make a star ornament using up-cycled pieces of fabric:
Create the template. We start by cutting two stars of the same size. We traced one star directly in the fabric using a black ink pen, then we copied the shape to create the second star. We personally like that the star shape is not completely symmetrical, but you can definitely make a symmetrical template using paper if that makes the process easier for you. Each of these pieces will be the front and the back of your star ornament.
Cut a smaller star for the front. This star will be a bit smaller using felt or another kind of fabric. Adding two different textures will add a fun touch to the ornament.
Glue or sew the smaller star on top of one of the big stars. I used hot glue for mine, but you can use yarn and add some stitches around the star shape so it stays in place.
Draw a face to the star using yarn. Some cute curves made the eyes and mouth on ours.
Add other decorative details. The yarn can be used to add colorful stitches that look like dots or fun lines like confetti, sequins and beads always look amazing because they are sparkly. Have fun! This is our favorite part.
Sew the star together. When you finish with the decorative details, sew the front and back of your star ornament (the two big stars), leaving a small opening so you can add wadding or fabric scraps to make the star ornament look fluffy.
Add ribbon to create a Christmas ornament. Now is time to glue or sew a medium size piece of ribbon to the back part of the ornament to be able to hang it in your Christmas tree.
Now you have a super adorable star ornament to decorate your Christmas tree or give it to friends and family this holiday season! It will fill your home with joy and color ✨
Check out the video where we shared this project over Instagram :)