How to Make a Dry Erase Board On Furniture
Make your own dry erase board on top of a piece of furniture! Check out this tutorial to see how to do it yourself.
When I heard that Sherwin Williams had launched a new product to make your own sketch pad, Sketch Pad™ Dry Erase Coating, I knew I had to try it!
Inside the package box I found everything I needed to make my own dry erase board including the products, accessories, gloves, roller, and tray.
As for the canvas, the possibilities are endless. You can use any piece of furniture from your office or kitchen to make a dry erase sketchpad and be able to write all your notes, or use a piece of plywood that hangs on your walls or your own walls and let the kids doodle all over them!
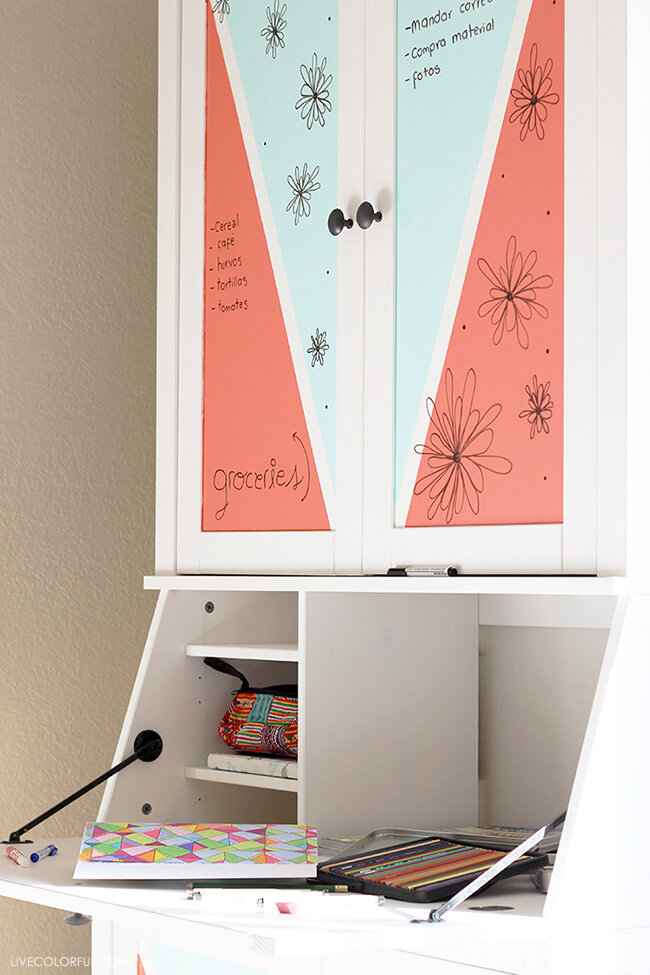
I decided to create my own sketch pad in a piece of furniture I have in a corner and that I use as a desk. The result is amazing! because instead of leaving post-it notes all over the desk, now I can use dry erase markers and leave the notes just there.
I color coded the piece of furniture too, as an extra touch, to be able to separate the notes I wanted to add. Being able to paint with a base color gives you endless possibilities! You can paint your walls or piece of furniture with any other color you want before applying the sketch pad dry erase coating.

Above you can see how I made my dry erase board at the top of my desk and it turned out amazing!
Find out how to make yours below:
MATERIALS:
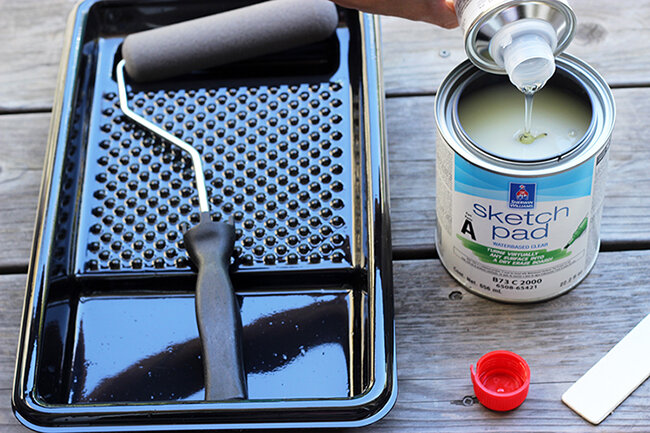
Sketch Pad™ Dry Erase Coating kit (Inside the package you will find two containers, roller, tray, and gloves)
1 Quart of Emerald Interior Acrylic Latex Paint. Color: Coral Reef (SW 6606). Sheen: Glossy
1 Quart of Emerald Interior Acrylic Latex Paint. Color: Teal Tame (SW 6757). Sheen: Glossy
2 Brushes 1 ½ "(Premium XL Polyester Sash Brush Angle)
1 Scotch-Blue™ Painter's Tape for Multi-Surfaces (1 "or 2")

How to Make a Sketch Pad Over Furniture:
1. Paint a base color over your piece of furniture (optional). I painted two colors as a base because I wanted to color code my desk and be able to separate my personal notes from my office notes. If you like the idea, apply some painters tape to divide the area to be able to paint with each color. Apply two coats of each color paint and let them dry for a couple of hours.
You can also paint the surface with just one color, because remember that the sketch pad coating is clear, so you could even paint a mural below or any kind of colorful design!

2. Create the sketch pad dry erase coating mix. Now it's time to create the product mix for the dry erase sketch pad. First, you have to pour the half int of Part B to the quart of part A. Mix it all together using the provided stir stick for 2-3 minutes or until a uniform milky white color develops. Just follow the instructions carefully and you will have the magic product ready!
4. Apply the sketch pad dry erase coating mix. Apply the mix using the black sponge applicator that is included in the kit. If you find some imperfections after you finish applying the first layer, you can apply a second coat. Wait a few minutes between coat and try not to apply too much product so it dries properly.
The material will appear milky white when mixed and during application, but it will dry clear, do don’t be afraid.

5. Let the mix dry for couple of days. After the mix is dry, the surface will be ready and will look clear! It will be ready for writing with any dry erase marker after 7 days, but the wait will be so worth it!
Use any dry erase eraser to clean your new sketch pad any time you need to.

I was delighted with my new dry erase sketch pad! It's great being able to write notes on the cabinet doors in my desk, and the best part, it doesn’t take any extra space out of my already crowded office.
Someday, I would like to add this idea in a kids room or one of the kitchen walls corners, how fun would that be?

This post was created in partnership with Sherwin Williams. All pictures and opinions are my own. Thanks for supporting the sponsors that allow me to create new and special content like this for Live Colorful.